Creació de regles de filtrat de correu

SMX1 · Gmail · Gestió del Correu

Email Management: Automated Filter Rules

Gmail Filters let you automate your workflow — sorting, labeling, and archiving incoming messages automatically so your inbox stays organized without any manual effort.

01
Introduction

Why automate your inbox?

Managing a high volume of emails can be overwhelming. Gmail Filters allow you to automate your workflow by automatically sorting, labeling, or archiving incoming messages based on specific criteria.

This ensures your inbox stays organized without manual effort, so you can focus on what actually matters.

Automatic Sorting
Emails are categorized the moment they arrive, keeping your Primary inbox clean and focused on priority messages.
Smart Labeling
Assign custom labels automatically so you can find any email instantly without searching through clutter.
Zero Manual Effort
Once a filter is configured, it runs indefinitely — every matching email is handled exactly the same way, every time.
02
Configuration Panel
Accessing the Filter Settings

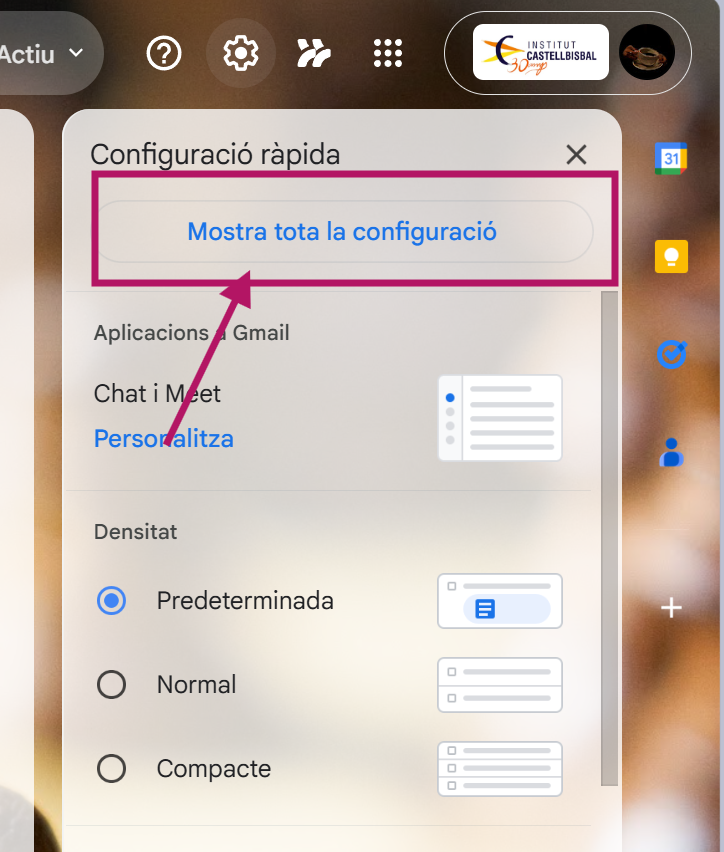
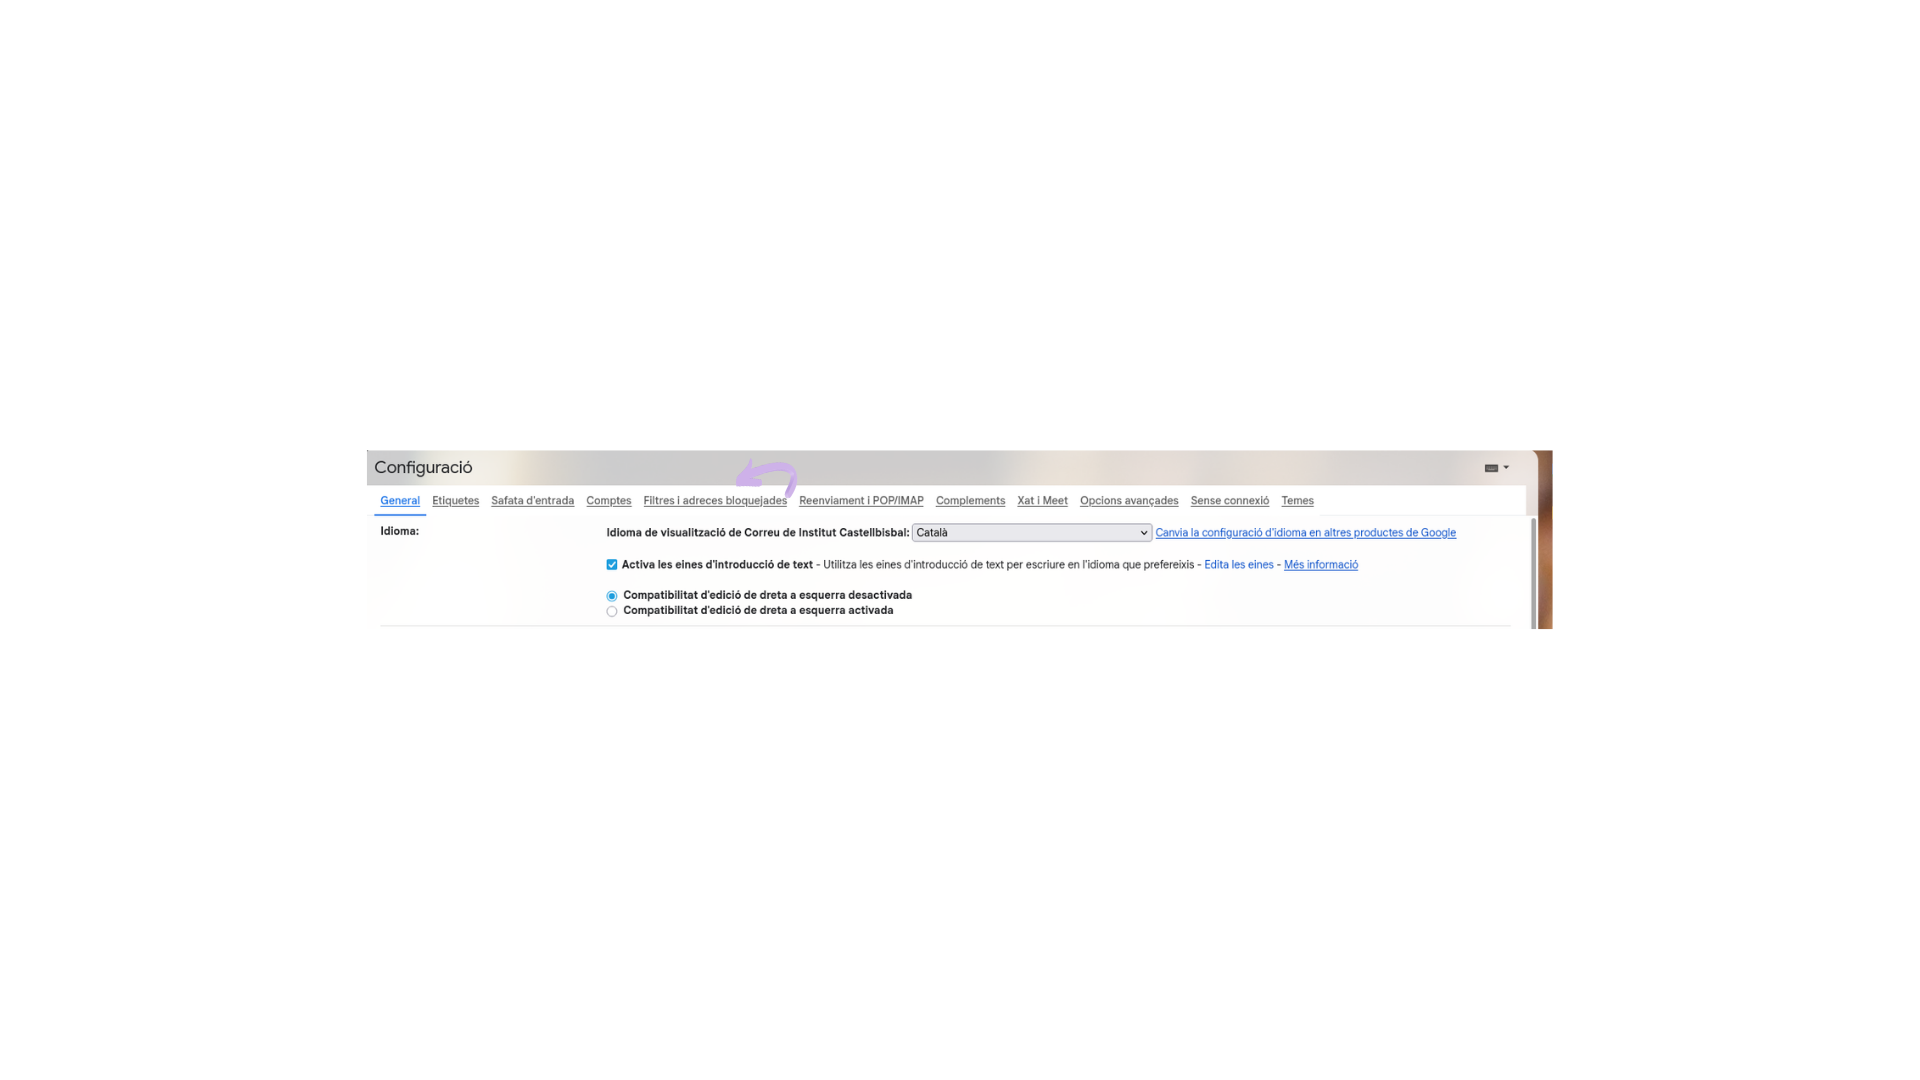
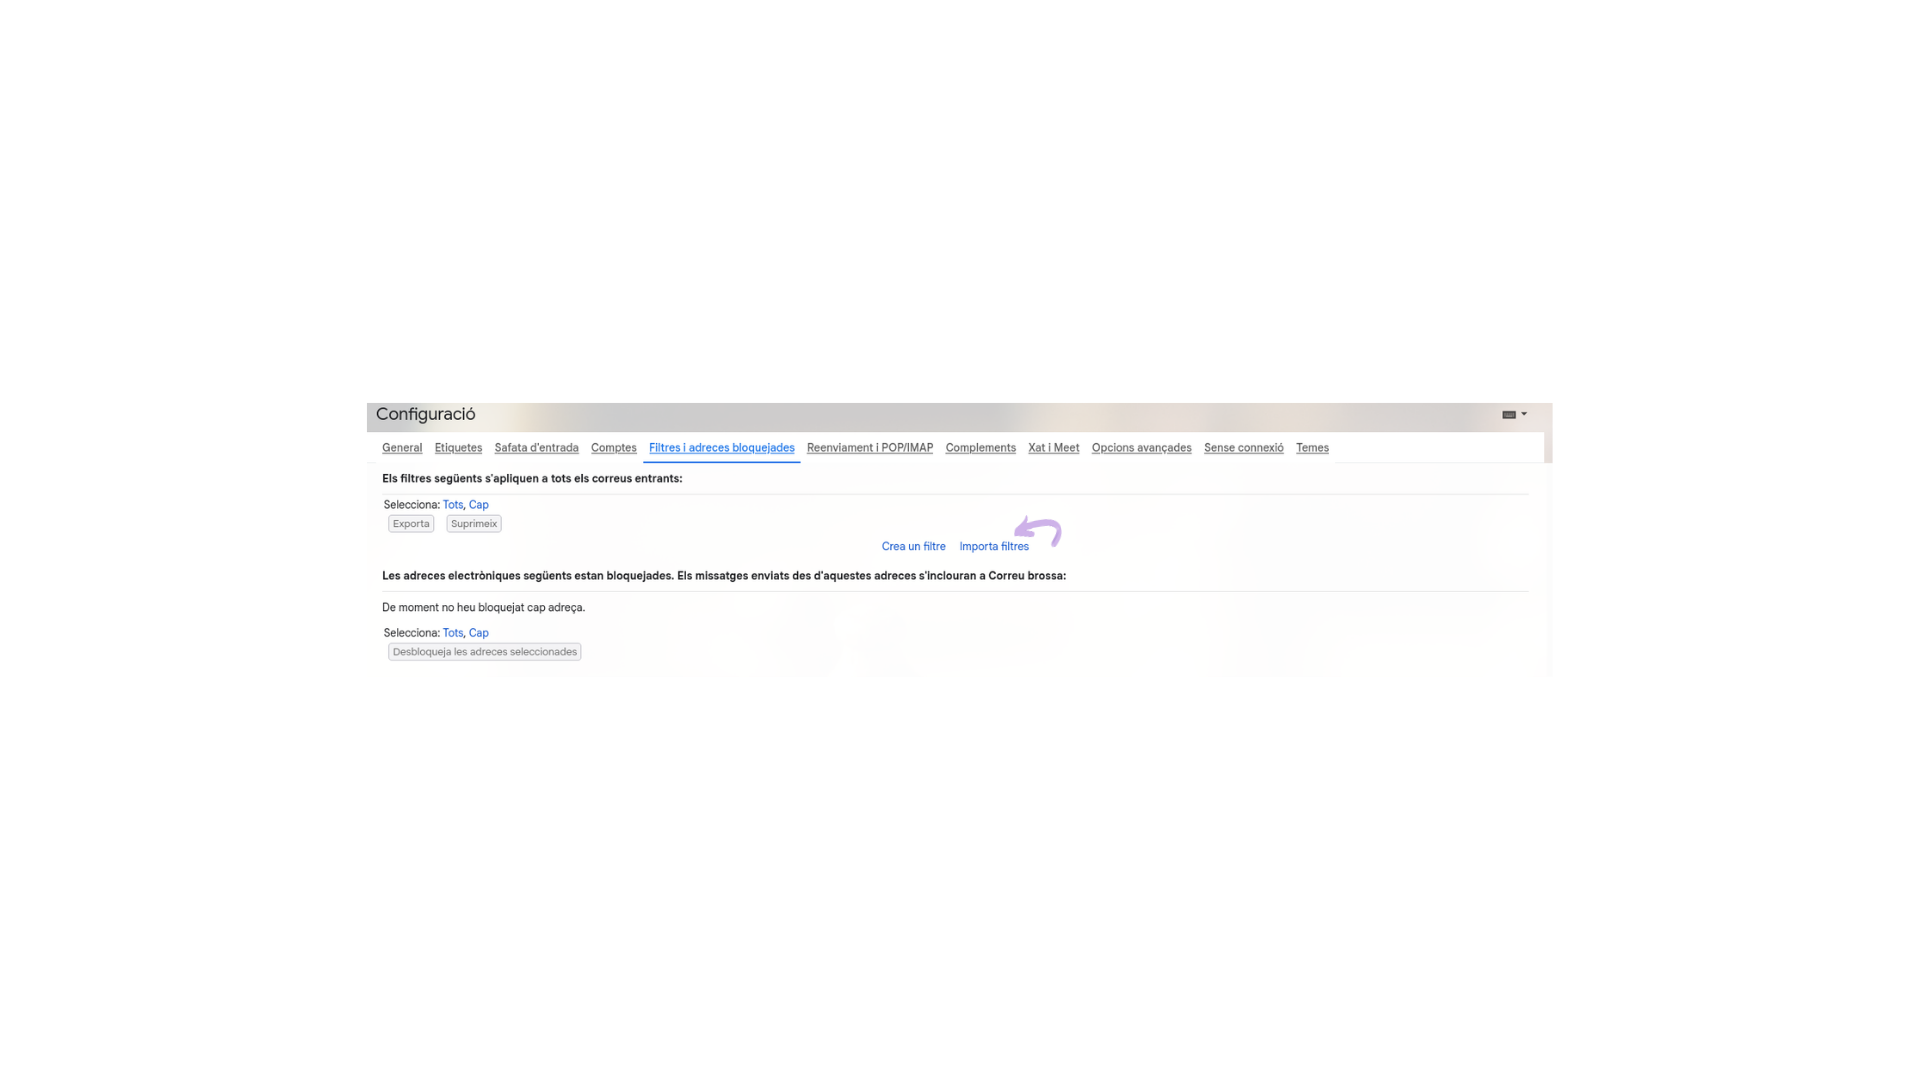
The first step is to enter the backend settings of your Gmail account to find the filter creation interface.

Navigate to Settings: Click the Gear Icon (⚙️) in the top-right corner and select “See all settings”
Open Filters Tab: Go to the “Filters and Blocked Addresses” tab and click “Create a new filter”
Gmail settings gear icon
Filters and Blocked Addresses tab
03
Filter Logic
Defining Criteria and Actions

Once the filter window opens, you must tell Gmail which emails to look for (criteria) and what to do with them (actions). This two-step logic is the core of every filter.

Step 01 — Criteria Step 02 — Actions
🎯 Criteria example used: Filter emails From: imannoor sent To: iman.noor — this targets a specific sender/recipient combination for precise filtering.
Apply Label: Check “Apply the label” and select or create a new label (e.g., TEST-FILTER) to tag matching emails automatically.
Categorize: Select “Categorize as: Promotions” to keep these emails out of your Primary inbox and reduce visual noise.
Filter criteria configuration
Filter actions selection
04
Activation
Finalizing and Activating the Filter

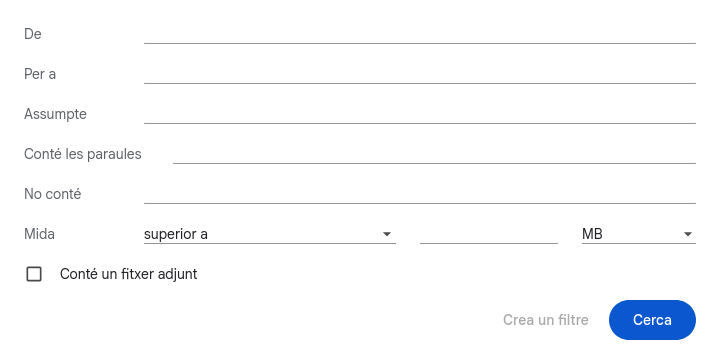
After selecting your desired actions, click the blue “Create filter” button. The rule is now permanently active.

Click the blue “Create filter” button to confirm and save the rule
Any future email matching your criteria will automatically bypass the clutter and go exactly where you designated it
You can also check “Also apply filter to matching conversations” to process existing emails immediately
Active filter in TEST-FILTER label
Conclusion
✅ Your inbox is now a self-managing system

By implementing automated filter rules, you transform your inbox into a self-managing system. This not only saves time but also ensures that important emails are labeled correctly and low-priority messages are categorized appropriately — leading to a much more efficient digital workspace where you always know exactly where everything is.